Wednesday, May 25, 2011

Starrlight Traditional Semi-Sweet

Finally, the very long and overdue tasting of Starrlight’s Traditional Semi-Sweet mead.

When I first tasted this mead at a renaissance faire recently it was the third or fourth mead in the group that we tasted and it had an absolutely wonderful wildflower honey taste to it.  Given how much I love honey it was inevitable that I would fall in love with it and I just had to buy a bottle.  The price was only $16 a bottle and it comes in a very attractive blue glass bottle with attractive and easy to read labeling.

After bringing this mead home, we popped it open and poured a few glasses.  It’s a very beautiful golden color like a light apple juice and incredibly clear with no carbonation.  The mead also has a slight scent of honey to it if you’re paying attention.

On first tasting it didn’t quite have the same amount of honey flavor to it that the one at the faire did.  I later discovered, since I’m by no means a wine connoisseur, usually during tastings you start with the dry wine first and then work towards the sweeter ones to help accentuate their sweetness.  I wanted that sweetness, and I wanted it bad.  What had I gotten myself into?

Fear not fellow readers! There is hope!  I also discovered that a cleansing of the pallet can work wonders on the taste of a wine.  I just took a couple bites out of some bread I had laying around and it helped bring out that wonderful honey flavor with a wildflower honey finish to it.  I also discovered that I much prefer my mead cold.  Maybe that’s a personal preference or maybe it’s supposed to be served chilled, I’m not sure.

With these things in mind, my next few glasses as I went through the bottle were very enjoyable.  Taking sips of what felt like cold wildflower honey to warm the soul.  This mead is only rated around 12.5% alcohol by volume, but each sip sends a sweet and warming sensation all the way down to the gut.

Overall I would recommend this mead to anyone that:

  • Enjoys a good glass of wine
  • Enjoys a traditional semi-sweet mead
  • Enjoys an alcoholic beverage every now and then
  • Enjoys the taste of honey and is interested in what a traditional mead can taste like.

Monday, May 2, 2011

Strawberries, Honey, and Krausen Oh My!

As I may have mentioned in a previous post, I have been interested in trying to create a strawberry mead.  Although I supposed that technically it should be called a “melomel” as a melomel is a mead with fruit added in any form from fresh to dried to juice.  This past Easter I got my wish of 2 pounds of strawberries from my wonderful wife and I  decided to give it a shot.

Experiment #2 is a 1 gallon melomel using:

  • 3 lbs. of orange blossom honey
  • 2 lbs. of cut slightly sugared strawberries
  • around 3/4 gallon boiled water to fill
  • Lalvin D47 yeast
  • 1 tsp. of yeast nutrient

Once again I bought everything I needed except the water and strawberries from American Brewmaster.  I also picked up another airlock, since I only had 1 to begin with but 2 jugs, and this time I decided to go with the 3 piece instead of the S type airlock as you’ll notice in the pictures.  All in all I spent $25.00 for the ingredients minus strawberries and airlock.

The overall process went like this:

  • Boil a gallon and a half of water for 15 minutes.
  • Add honey to jug
  • get yeast activated
  • Cut up strawberries while waiting for water to boil
    • Occasionally QC strawberries for tartness
    • Add a very small amount of granulated sugar to start pulling out the strawberry juices and sweeten them. I used maybe 3/4ths of a tablespoon and hand tossed them.
  • Cool boiled water and then add to jug (you don’t want your jug exploding on you do you?)
  • Shake for 5 minutes (I don’t know how my arms didn’t physically detach from my body and run away screaming).
  • add yeast nutrient and strawberries and mix well
  • Pitch yeast and mix a little bit
  • Airlock and wait

The result was this:

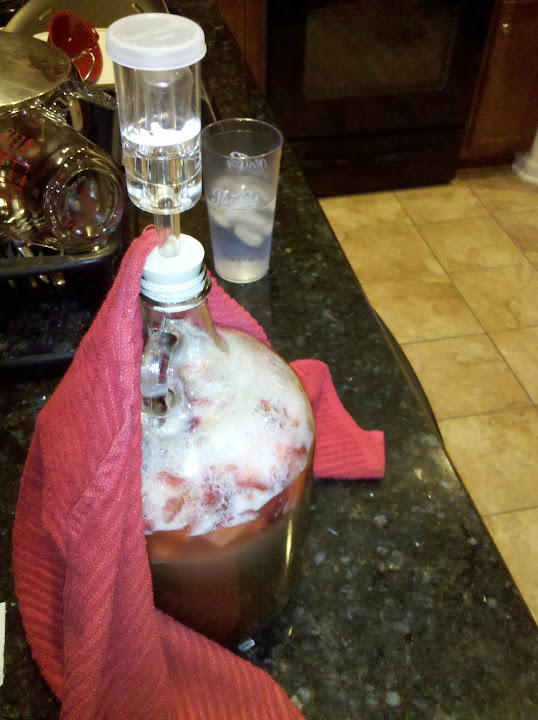
Within an hour the airlock was bubbling nicely around 20 seconds per bubble (this has since dropped to as low as a bubble every second to 5 seconds). Within a couple of hours I noticed this:

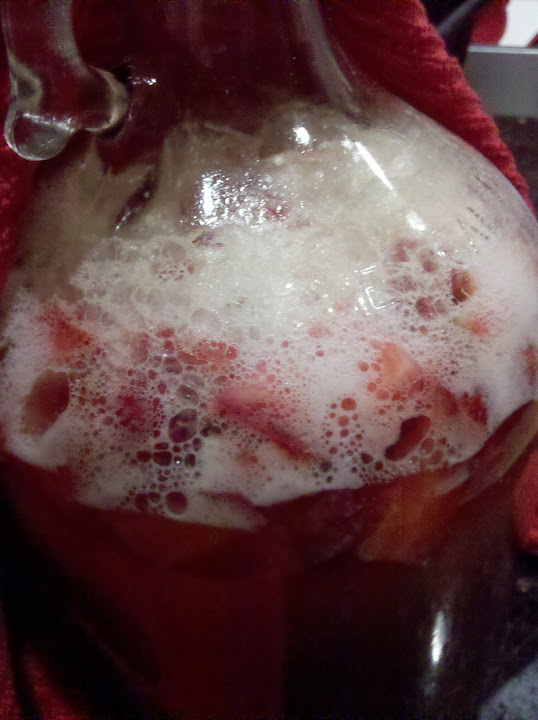
I know that there was some foam that was there from the beginning due to all the shaking of the must but… it couldn’t be… kr…kr…krausen!? I anxiously crossed my fingers in hope that it would stop before it got to the airlock.  For those that don’t know, krausen is the technical term for the foam that forms at the top during fermentations.  Sometimes this foam can be little to none like shown in my previous experiment or it can come crashing through your airlock like the Terminator coming after the un-lucky Connor family.  This foam is completely normal and nothing to really worry about unless it’s wearing sunglasses, totes a shotgun, and has a jaw sharper than a katana.

My situation was unfortunately the later.  The foam came seeking air, getting in my airlock despite my best suctioning efforts with a sanitized turkey baster.  Around 3AM when I realized the foam would not cease, nor desist, I decided to improvise and cut a hole in the bottom of a plastic cup, stick it over the top of the jug and cover the top of the cup with saran wrap.  It should keep anything out but still let the foam escape.  This worked and I thought the foaming was finished so I threw away the plastic cup the next day and to my horror it wasn’t done foaming and that was my last plastic cup I threw away.  On top of this it was now Sunday night and any store I could use to make a blowoff setup was now closed.  My improvisation this time around was just to take a cup and put it upside down over the mouth of the jug to keep stuff out.

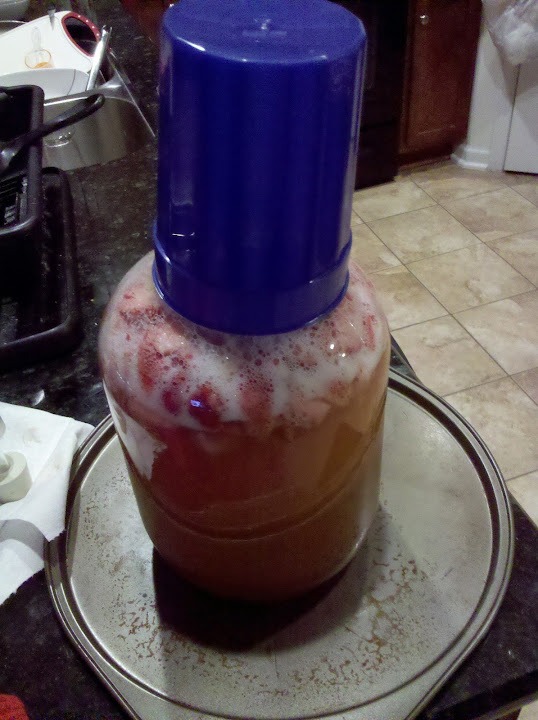
Men, and women, I highly suggest if you are dealing with krausen that’s going to be running down the side of your equipment to place something under said equipment to help ease with cleanup after the foaming stops or you finally get your blowoff set up.  I used a baking sheet and that helped keep the counters nice and clean instead of annoyingly sticky after the fact.

For those that haven’t seen a melomel, and maybe it’s just because it’s a strawberry melomel but I doubt it, during the initial portion of fermentation it’s not exactly the prettiest gal at the dance.

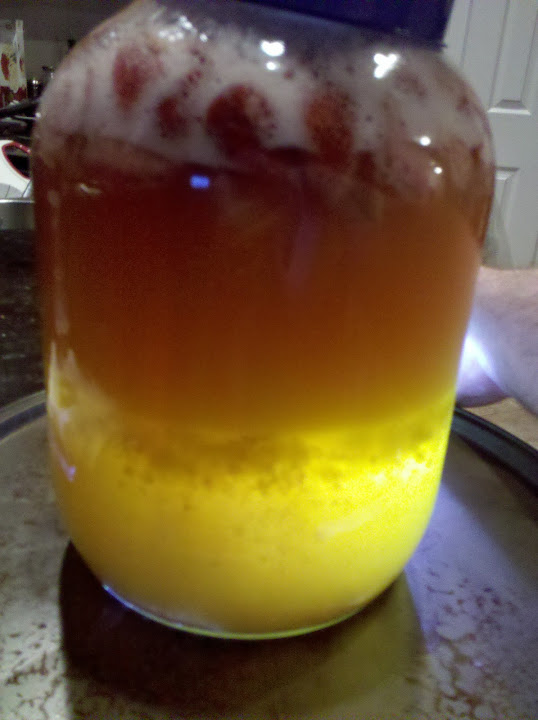
And it only got more “yucky” looking as time went on with weird floating tendrils and “gunk” floating around in the bottom section.  Eventually this all settled down and the fermenting mixture became so opaque you can hardly see a light shining into it from the other side.

Now my mead… er… melomel is known to be fermenting strongly and I seriously need to set up a blowoff.

A blowoff is simply an airlock on steroids in a sense.  Instead of a nice compact little piece that fits in the top of a drilled stopper, it’s a hose that feeds from the top of the fermenter into another container that has a layer of sanitized liquid or vodka in the bottom of it to prevent air from getting sucked back into the fermenter.  I looked around on the wonderful internet and noticed an idea for an easy blowoff setup where the only thing I was lacking was a hose.

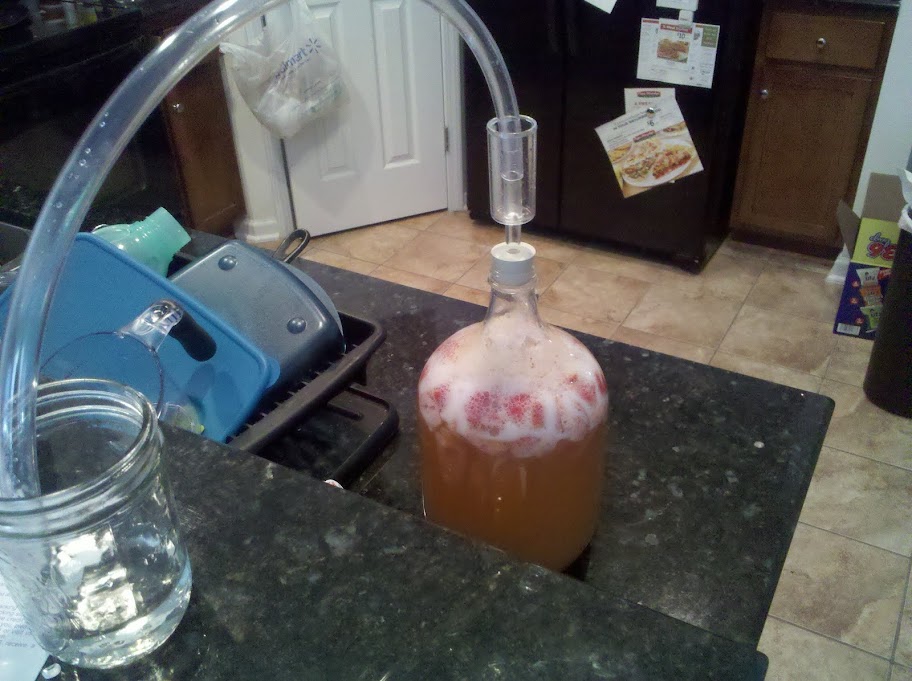
The idea as you can see in the picture is to take your 3 piece airlock, take the cap and float out of it and fit a tube over the inner tube of the airlock and then run that newly hooked on tube into the 2nd container with sanitized liquid.  Again I went to the good fellas down at American Brewmaster and told them my problem, how I wanted to solve it, and the gentlemen knew exactly what I was talking about and cut me off a 2’ piece of hose.  The ID (Inner diameter) fit PERFECTLY over the inner tube of my 3 piece airlock and looks like it’s probably about a 1/2” ID.  I’m probably completely off on this but that’s what it looks like to me (I think this is one of those cases where size does matter).

Now with my blowoff setup, the melomel was free to foam to its hearts content which it obviously didn’t HAVE a heart because it was hell bent on keeping me from sleeping soundly.  It never foamed into the 2nd container but it did manage to get a good ways up the tube.  Once the foaming stopped, I just filled the airlock up with some sanitized liquid (up to the appropriate mark to use it as an airlock), pulled the tube off, put the float and cap back on, and have been letting it ferment soundly since then.  The strawberries are losing color which is to be expected so I will probably look into racking it out of this jug and into another one in the next week or so.

At that point my plan is to let it ferment in a secondary for a month or so and then rack into a tertiary onto some fresh strawberries, blueberries, and maybe some clover honey to help bring the melomel back to the sweeter side of things and also bring back some of the fruit taste, and then let it age for a couple of months after removing it from the fruit again.

By the way, I did finally open that bottle of semi-sweet traditional mead from Starrlight Mead but seeing how long this post is already I will fit it in either during the week or as the topic for next weeks post.

Until next time,

Be well and thanks for all the fish!

Sunday, April 24, 2011

A Word of Advice to the Newcomers

Wait a few days before you start to get in a panic about your mead not fermenting, or fermenting “right”.  Yes, that was me.  Captain impatient to the front lines checking the time between bubbles coming through my airlock every couple of hours.

When the fermentation was really getting started I was very excited because a bubble was coming through the airlock roughly every minute.  Next thing I know after about 36 hours it had slowed to a bubble every minute and a half or more! “Egads!  It couldn’t be!” I said to myself.  Meanwhile my wife, not understanding the doomsday scenario playing out in my head where honey bees come to claim those that misuse their sweet work, attempted to calm my nerves.

“Honey, “ (eh? eh? see what I did there?) “Honey, “ she said, “would you stop checking the bubble every 30 minutes.”

“But! But! What if it’s a stuck fermentation! I would have to do something about it! Pronto!” I would retort.  I considered throwing in some yeast nutrients or energizer, neither of which I have yet, but instead I decided to move the carboy from the kitchen counter into the kitchen closet and cross my fingers.  Lo-and-behold after about 24 hours in there my bubbles were coming at under 60 seconds per.  Tonight they are down around 28 seconds per bubble.

Wahoo! I say to myself.  There’s some amount of satisfaction that comes from watching this creation slowly unfold itself while it still maintains its mysteries of taste, and smell.  I very eagerly await the day that I can pop the stopper out, siphon into a secondary, and siphon a little off to have a little taste test.

On a little side note, I bought a bottle of Starrlight Mead’s Traditional Semi-Sweet Mead a few weekends ago at a local renaissance faire after trying it in a taste testing.  I was originally going to pop this bottle in celebration of my mom graduating from truck driving school this weekend and while I still plan on opening it in celebration it won’t be for another week or so now when my parents come back into town.  I will be sure to post a quick note on it once I open it.

ttfn and thanks for all the mead

Saturday, April 16, 2011

First batch, easy and cheap

It's official, my first batch of Mead is fermenting!  I was a bit surprised to be honest.  I just knew that I screwed something up somewhere along the line and that it wasn't going to ferment, at all.  It didn't help that after I got everything mixed together, plugged, and my airlock inserted that I sat there and watched the water moving into the wrong chamber.  I decided not to freak out about it and just see what happens and after going to dinner and returning, the air pressure was now going the right direction and I sat and watched a bubble push its way through and not so silently cheered.


This is my first ever attempt at trying to brew anything and I have absolutely no idea how well it's going to turn out in the end but hey! it's fermenting right? That's a first step at least.  For those that want to know, the whole setup cost me around $28.00.  Everything except the distilled water I purchased from a local store called American Brewmaster.

In total I purchased:
  • 2 1 gallon glass carboy jugs
  • 1 Lalvin D47 dry yeast
  • 1 #3 drilled stopper
  • 1 S type airlock
  • 1 8oz package of One Step
  • 1 lb of orange blossom honey
  • 1 screw cap (to keep the dust out of my empty jug
This is roughly half a gallon of must so I'm hoping the 1 lb of honey will make it sweet enough but only time will tell I guess.  In searching around I found a super simple recipe that I mostly followed from Storm The Castle.  Unfortanutely I didn't have any oranges, or raisins, so I substituted around a tsp of lemon juice and around 2 1/2 tbsp of light brown sugar.  Again, I have no clue how this is going to turn out but I have my fingers crossed that it's going to come out tasting at least 80% like mead and 20% like rocket fuel.

For those interested here is the quick run-down on the process I followed.

#1 - SANITIZE EVERYTHING.... Seriously, my sink has never looked so clean, ever.  I scrubbed the kitchen sink down with just a little bit of dish detergent and then washed it out really, really good.  Then I plugged it up and made a batch of One Step to sanitize the sink and anything that would be coming in contact with the must or yeast.

#2 - Started the yeast activation.  Heated a little bit of water, mixed it together with the D47 yeast, agitated it a little bit to make sure that some of the yeast was getting to the water, and then set a timer for 15 minutes (package instructions).

#3 - Made the must.  Poured the 1lb of honey, 1/2 gallon of distilled water, 2 1/2 tbsp light brown sugar, 1 tsp lemon juice into a 1 gallon glass jug.  Threw the lid on and began mixing and aerating.  Proceeded to shake the jug for 5 minutes.

#4 - Pitched the yeast into the must.  Gave it a little swirl to try and make sure the yeast was distributed into the must.

#5 - Plug with stopper and airlock, wrap in towel.

That was basically it.  In the future I'll probably go into a bit more detail on some of these steps and I'll definitely make sure to let everyone know how this concoction tastes when it's done fermenting in a few weeks.  Now I just have to hope that the fermentation continues like it's supposed to and it doesn't wind up just dying off.

For now, Be Well Readers!